Rules for painting with acrylic paints on canvas. Features of working with acrylic paints
If you have a great desire to paint with oil paints, but you do not know how, then it does not matter. It's never too late to start learning how to paint with oil paints. You can always try and create your own personal masterpiece.
How to paint with oil paints - color choices
In order to start painting, first of all, you need to purchase oil paints. The choice of paints must be given special attention. Indeed, both the aesthetics of the picture and the success of your training depend on the quality of the paints; the question will be decided whether you will be engaged in drawing oil paintings. Do not chase discounts and sales, as they often sell low-quality goods. At a minimum, you need to purchase 7 tubes of primary colors. In the future, by mixing different colors, you can get any other color.
How to paint with oil paints - art tools
To paint with oil paints we need:
- various brushes;
- canvas;
- palette knife;
- palette;
- solvent for paints.
Brushes are round, bristle, flat. It is advisable to purchase at least 3 brushes of each type, different sizes... Note that natural brushes are softer and synthetic brushes are rougher. Also, don't forget to prepare a water mill for your brushes and rags.

How to paint with oil paints - workplace
The workplace should be prepared so that nothing interferes with you and it is comfortable to create. It is best to use an easel for drawing rather than a table. It is desirable to place it where natural light is predominant. It is better to paint outdoors, as the paint has a strong smell. If this is not possible, then the room should be equipped with a window, an opening window or a balcony. Periodically, you need to ventilate the room. The easel must be adjusted in height just for you. When adjusting the easel, consider your position, whether you are standing or sitting. In order not to stain the floor, it is advisable to cover it with paper, polyethylene or cloth. Oil paints go deep into the structure of the fabric, so wear clothes that you don't mind getting dirty. If you have long hair, it is best to braid it or pull it up in a ponytail, and to be sure, wear a kerchief. 
How to paint with oil paints - sketch
- When creating an oil painting, it is advisable to start with a sketch. Work begins with a layout on a sheet. It is necessary to think over where the main semantic center will be located.

- It is necessary to decide on colors... On the palette, you can achieve the desired color. Since it is almost impossible to get the same color twice when mixing two or more colors, it is necessary to prepare secondary paint for the entire drawing. Oil paint that does not mix with other colors is called solid color. After creating a sketch, start working with a brush with paints.
- Any drawing has a source of light and shadow. To make the drawing more realistic, you should add shadows, highlights. It is necessary to determine from which side the light falls in order to depict it in the picture. Evaluate the picture from the side, add missing accents.

- The palette must be greased with oil so that it is saturated with it, otherwise it will absorb the oil that is in the paints.
- Initially, properly manage the space on the palette, leave the middle for mixing colors, on the left for colored paints, on the right - white.
- For a lighter shade, add white.
- For a darker shade, add black paint.
- In the course of drawing with paints, adhere to the basic rule, first we paint with liquid paints, then thick ones, and nothing else. If you do not adhere to this recommendation, then incorrectly placed layers will simply crack when dry.
- The paint layer dries for about three days. Take your time to apply the next coat.
- You can paint with a palette knife, for example, create a landscape.
- If there is excess paint left after work, don't worry, you can save it. Place it in a jar, cover with plastic wrap to prevent it from drying out.
- Don't forget to pay due attention to your brushes after work. They must be washed or thrown away.
- The finished painting must be opened with varnish.

Painting with oil paints is not difficult if you follow the tips above. Conquer the heights of your skill!
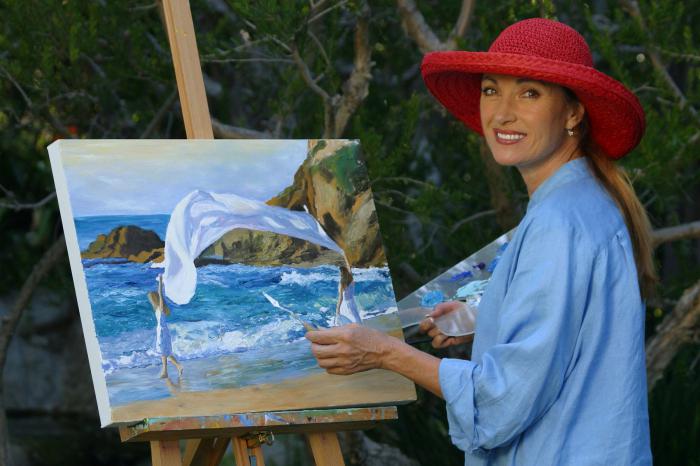
How nice it is to be an artist! After all, he can capture the beauty of the world around us in watercolor landscapes, pastel drawings, and oil painting is generally some kind of miracle! Sometimes you look at a picture - and you want to step over the border of the baguette and dissolve in the wonderful world painted on canvas by the artist's talented brush. Do you also want to be among the lucky few who can be fluent in brush and paints? If you are not afraid of difficulties, and determination and love for drawing overwhelm your heart and soul, then go ahead! We are confident that with your determination, you will become a true master very soon.
Oil painting - where to start
Getting started is always difficult. Painting on canvas with oil paints is a business that requires a lot of knowledge, skills and abilities. Of course, it's best to start getting involved with art as early as possible. Unfortunately, not all of them were taken to art school by their parents.
But nowadays there are art studios for people of all ages, where everyone can study oil painting. A master class in such schools is usually taught by experienced teacher-artists who are well versed in the subject and can fully reveal all the secrets of the mastery. If, for some reason, you cannot or do not want to visit such an institution, then this is not a problem either. After all, a stubborn and purposeful person can learn to paint oil paintings on their own. And first you need to go to the store and buy everything you need for painting there.
What materials will be needed for work
Oil painting is a business that requires not only talent and skill, but also significant financial costs, because in order to paint pictures, you will need a lot of everything. Here is a list of what you need to get started:
1. Special oil paints in tubes.
2. Natural bristle brushes of various sizes (flat) and a kolinsky brush (round) for finishing your painting.
5. Charcoal for drawing a preliminary drawing on the canvas or a simple soft pencil.
6. Subframe. It can be ordered in a baguette workshop or bought ready-made in a store.
7. Primed canvas.

Well, now you are almost fully armed and you can start the creative process. But first listen to our short story about the properties of oil paints.
About oil paints more
Beautiful oil painting is breathtaking. But have you ever thought about how much time the master spends at the easel? Much also depends on the quality of the paints that the artist uses. Now it is difficult for us to imagine, but once the painters had no idea about oil paints. They were invented only in the 15th century by the Flemings, and the secret of their manufacture was kept in the strictest confidence for a long time. Can you imagine how lucky we are ?! Nowadays, such paints can be bought completely freely, and of the most excellent quality!

You need to know that white is consumed the most when working. Therefore, if you buy paints in a set, then buy a few more tubes of lead for them, or You can also not use ready-made store kits, but collect your own palette. Just don't try to buy as many flowers as possible right away. Take only the basic ones: whitewash, black paint (it is best to get burnt bone), ocher (yellow and red), cadmium red, or cinnabar, kraplak, cadmium yellow, green chrome, ultramarine and cobalt blue, Mars brown. At first, such a set will be quite enough.
Oil painting for beginners. Stages of work
As you know, the elephant is best eaten in parts, so let's find out what stages the work on an oil painting will consist of.
1. First you need to decide on the nature, i.e. decide what exactly you will paint: a still life, a landscape, or maybe even aim at a portrait?
2. Let's say you have chosen a still life. As you know, it consists of several different objects that must be carefully drawn, in addition, it is necessary to think over the lighting properly. The play of light and shadow is very important point, which in no case should be forgotten.
3. If you have a primed canvas and a stretcher separately, then you need to fix it and stretch the canvas with a stapler for furniture.
5. Now it's time to do the initial underpainting. Here, your task comes down to dealing with the basic colors, shadows and light in your painting. After this step, your oil painting should dry out a bit. You can return to work on it the next day.
6. After the sketch is dry, you can proceed to further creativity. It's time to refine the contours and work out the details.
7. At the final stage, wide brushes should be set aside and pick up a round thin kolinsky brush. She applies the smallest finishing touches to the picture.
8. Well, the work is ready. After the painting is completely dry, you can cover it with a special varnish.
Where is it better to start: with a portrait, landscape or still life?
If you have never practiced oil painting on canvas before, then you should not start with a portrait, because this is the most difficult thing. And the landscape is difficult for an inexperienced artist, especially if you want to paint it from life. The difficulty arises largely because the lighting in nature is constantly changing, the trees move from the wind, and there are too many different distractions: buzzing mosquitoes and flies, annoying passers-by, etc.

Another thing is a still life (dead nature): he made it up from different objects, and it will stand as pretty as long as you need. Just do not immediately try to imitate "Little Dutchmen" and take on a complex composition consisting of many objects and colors. For a start, it is better to be content with a modest still life of two or three things.
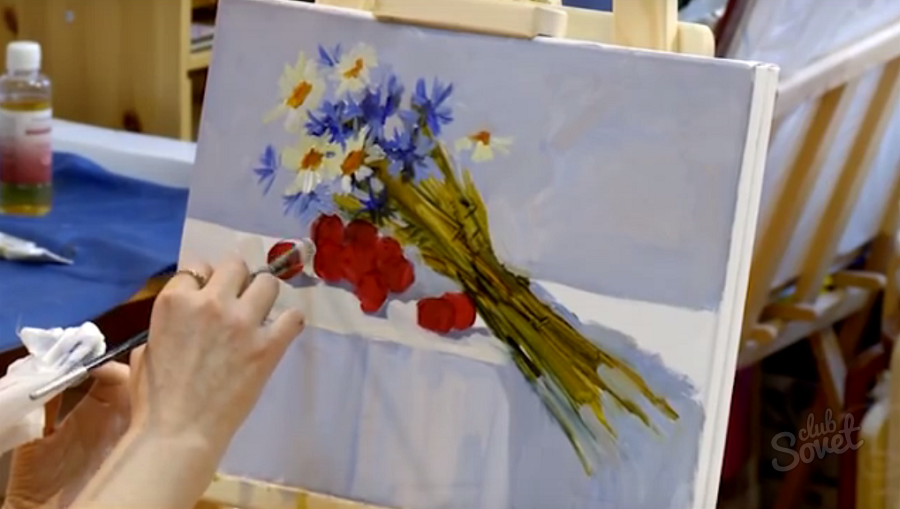
How to use the palette
You've probably seen in different films how venerable painters beautifully hold a palette with one hand, and paint freely on canvas with the other. You can also do this, for this there is a special hole in the palette: insert there thumb, and the rest support it from below - very convenient, try it!
![]()
The paints are squeezed out onto the upper left edge of the board, and the middle of it should remain free - you will mix colors on it. It is very important: after the painting session, do not forget to scrape off the unused paint, otherwise it will dry on the palette and interfere with subsequent work.
Oil painting technique
Learning to paint in oil can be slowed down due to the fact that a novice artist may have poor understanding of the technique of such a drawing. Oil paints are very dense, and without experience, it can be difficult to achieve imperceptible tonal transitions. Take a look at reproductions of old paintings - you will not see a trace of brushstrokes on them. If you are attracted by just such a manner, then you will need to first of all master the so-called glazing technique. In this case, the paints are diluted with a solvent quite liquid, but practically they are applied to the surface of the canvas. It is difficult to explain in words, it is best to see how real artists do it.
Another technique that allows you to achieve beautiful effects in painting is shading paint with a brush on canvas. In this case, one color seems to be fused into another. And, of course, it is not at all necessary to try to paint without strokes. Maybe you want to take a role model
The last parting word to the novice artist
Well, that ended our little story about oil painting. The master class turned out to be small, but very informative. Now it will only depend on you how soon you will be able to please your loved ones with wonderful works. Start creating as soon as possible and do not be afraid of anything. We wish you creative success!
Acrylic paints for painting are a versatile option: they can be painted on a wide variety of surfaces.
Paper, cardboard, glass, wood, plastic, canvas and even metal - all of these materials are great for painting and decorative works acrylic paints... Large creative space, the ability to realize your ideas and fantasies - that's why many people fell in love with this type of paint.
For drawing with them, both natural and synthetic brushes are suitable, as well as a palette knife and, if properly diluted with water, an airbrush. For those who have already painted with gouache or watercolors before, drawing with acrylic paints will be easier than ever. If you purchase a set of acrylic paints for painting, you will get a number of advantages over other types of paints: they do not spread, do not fade, do not crack and dry quickly.
If you learn to paint with acrylic paints, you can achieve excellent results. For example, if you mix paint with water, you can achieve a watercolor effect. If you use a palette knife or a coarse bristly brush to paint, you will have the effect of a picture painted with oil paint. So, let's talk about the process itself in more detail.
Working condition of the paint.
Due to the fact that acrylic paints for painting dry incredibly quickly, you should squeeze them out of the tube quite a bit. And you should definitely purchase a sprayer to moisten the paint if you use a regular, non-wet palette.
Wipe off the brush.
Each time you wash your brushes, wipe them off with a cloth or paper towel. In this case, drops dripping from the brush will not fall on the drawing and leave ugly stains on it.
Color transparency.
If you paint with acrylic paints in a thick layer directly from the tube or only slightly dilute them with water on a palette, then the color will be saturated and opaque. And if diluted with water, the transparency of the color will be the same as that of watercolors.
The difference between acrylic and watercolor wash.
Unlike watercolor washes, acrylic washes dries quickly, sets and becomes insoluble. And this allows you to apply new layers to dried layers without fear of damaging the previous ones.
Glaze.
If you need a glaze in several translucent layers, then the layers must be applied very thinly so that the bottom layer is visible. That is, acrylic paint must be applied to the surface very carefully, evenly, thinly.
Fluidity.
To improve the fluidity in such a way that the intensity of the color does not change, you can use a special thinner, but not water.
Mixing colors.
Since acrylic paint dries very quickly, the colors must be mixed quickly. If mixing does not take place on a palette, but on paper, it is worth pre-moistening it - this will increase the speed.
Sharpness of boundaries.
To make the corners sharply and sharply defined, you can stick masking tape on the dried paint without harm to the drawing. But you need to make sure the edges fit snugly. Also, don't draw too quickly around the edges of the ribbon.
To give the canvas whitenessy,it should be covered with acrylic primer.
But if there is a desire to give the work a contrast then a dark acrylic emulsion can also be used. You can apply the primer with a brush in one or two coats. But if the surface is large, then this is not very convenient. The canvas should be placed horizontally and the primer should be poured onto it, while spreading it with a scraper in a thin layer over the entire canvas.
The right lighting for working with acrylic paints, the skillful organization of the workplace, has a positive effect on the creative process.
It is worth following some rules to make your work more comfortable and faster. Lighting should be even and diffused, the same throughout the entire working process. The light should be to the left of the canvas and in no case should it blind the creator.
Oil painting techniques are not only more complex than most other painting techniques, they are also more expensive in terms of materials. The use of textures and different application techniques allow you to embody the most diverse fantasies of the artist. That is why oil paintings have their own special charm, and many artists want to learn this technique, and even those who paint only for themselves.
Let's take a closer look at the basic things that will come in handy in order to learn the art of working with oil.
So how do you learn how to paint with oil? What is needed for this?
- Oil paints;
- Fixer;
- Palette;
- Glue;
- Flat brushes (very desirable from natural wool);
- Easel (canvas, canvas on stretcher);
- Palette knife;
- Eraser and pencil for contours;
- Tracing paper, carbon paper and other little things.
1. We buy everything you need for oil painting
After the acquisition of paints, canvas is the second most important, although the oil technique is quite applicable on hardboard, plywood or metal, sometimes coarse burlap is also used. But back to canvases, as the most common medium for oil paintings. They are of two types - cotton and linen. The former are much cheaper. Linen canvases, in turn, are divided into coarse and fine-grained. Coarse grains are best for textured paintings (for example, landscapes or textures that require deep drawing), fine grained for more detailed techniques. There are canvases stretched on cardboard (up to 0.5 x 0.7 m), they are cheaper, more expensive canvases on stretchers, but they come in much larger sizes.
Do not forget also about tracing paper and carbon paper, we will need them in order to transfer the image from the sketch to the canvas itself.
2. Preparing the canvas or any other surface for painting
First of all, we do some sketches and a final pencil sketch. Before painting with oil on canvas, you need to prepare it. To do this, glue it and carefully prime it, so the paint will fit well, and the active substances contained in it will not destroy the fibers of the canvas. When everything is dry, you can transfer our sketch to the canvas using tracing paper. For some multi-layer techniques, the sketch can still be coated with a thin layer of primer.
3. Choosing a drawing technique, deciding on a concept
This material was conceived primarily as an answer to the question "how to paint with oil on canvas for beginners", so for a start it is best to use the basic technique - alla prima. Its essence is to paint in one step (layer), there can be several approaches, but it is necessary to finish before the paint dries (about 3 days, depending on the thickness of the strokes). Directly mixed colors are lighter and more natural.

The multi-layered technique is more complex, but it allows you to use the full potential of oil paints - to create deep and voluminous textures. The first, the thinnest layer, is called "underpainting", it is done with highly diluted paints. This test layer is a kind of test that helps the artist determine further tonality, the possibility of using light and shadow, etc.
Subsequent layers are already beginning to draw details, convey the subtleties of the composition, colors and textures. In one of the last layers, linseed oil is introduced into the composition - to give the colors saturation (it also prevents the colors from fading). When the paint is completely dry, the painting is covered with a fixative varnish. This usually happens after 6-12 months.
4. Few technical details to consider
Concluding this short article, which can be called “How to paint with oil paints? A step-by-step guide for beginners ", we will touch on a few non-obvious points of working with an image relating specifically to the" oil technique ".
- In addition to a pencil, a sketch on a primed canvas can be done with charcoal or thinned paint;
- We draw objects of toroidal or spherical shape with twisted and crescent movements with a brush, and conical ones with triangular ones;
- In order to get a smooth gradient color transition, it is better to use very flat brushes. Paints can be mixed both on the palette and directly at the transition point with the proper skill. Brush movements should be cross and close to reciprocating. It is better to draw from a darker area to a lighter one with a clean brush so that the color is distributed more organically. Completing the strokes should use a parallel technique.

Layers used for shading should be applied over the dried paint layer. To obtain a light shading layer, the paint is diluted with a special solvent, and it is applied from a horizontal position with a core brush. To correct the color of the picture when glazing, apply strokes in the same vector as on the processed layer.
Here is a short and rather general answer to the question: "how to paint with oil paints on canvas", in order to understand each of the techniques in more detail, you will have to spend more than one day reading and months of practice, but for now try the simplest methods and draw. May inspiration always be with you!