Front door frames. Finishing door slopes after installing the front door
Slopes and extensions on entrance doors are additional elements used for arranging door structures that perform operational and aesthetic functions.
On the one hand, slopes and extensions increase the sound insulation of the room, become an obstacle for drafts and unpleasant odors from outside. On the other hand, they complete the composition of the door, giving it a noble and respectable look.
Price of slopes and extensions for entrance doors
Since slopes and extensions are designed to complement the design of a metal door, they are usually made of the same material as exterior decoration... So, for the door, you can pick up slopes from laminated MDF, solid oak, plastic, natural veneer.
How much do extensions and slopes cost for a metal door? The cost depends on the material and ranges from 450 to 550 rubles per one running meter.
How long does it take to make extrusions and slopes for a metal door? Typically, it is 10 to 15 business days, as follows:
- Solid oak panels will be produced within 15 days;
- Plastic or laminate slopes will be ready within 10 days after ordering.
- Prices are for 1 standard set
- The set includes 3 platbands: 2200mm-2pcs., 1200mm-1pc.
- Cutouts, curvature - 1000 rubles.
How to install slopes and extensions and what is the cost of installation?
The process of installing extrusions and slopes on a metal door can be represented as the following sequence of stages:
- Installation of a metal door and measurement of its parameters is carried out;
- Completions and slopes are made according to the established exact dimensions;
- The master goes to the site and tries on samples of products on the door;
- After 7-14 days, a complete set of fittings and slopes is installed on the door.
As for the cost of installing additional elements on a metal door, it is:
- Departure of the master for measurement with samples within the Moscow Ring Road will cost 1,500 rubles; outside the Moscow Ring Road for each kilometer, 30 rubles are added to the indicated price;
- The cost of installing slopes depends on their height and width. The minimum price is 4000 rubles. As for the platbands, when installed together with the door, they will cost from 2,000 rubles, and with a separate installation - from 3,500 rubles.
Colors
 |
||
| Wenge | Bleached chestnut | Hornbeam |
 |
 |
 |
| Walnut | Country oak | Caucasian oak |
 |
 |
 |
| Amber oak | Premium cappuccino | Whitewashed chestnut |
 |
 |
 |
| Lebanese cedar | Maple structural | The skin is brown |
 |
 |
 |
| Mahogany | Palisadr | Sapeli |
 |
 |
 |
| Dark walnut | Zest | Stained zest |
Slopes and extensions for a metal door - an ideal option for arranging doorways
Have you already thought about finishing the opening of a metal entrance door? This is a rational solution, since without slopes and extensions, the door looks sloppy and rough. Traces of installation, inconsistency in the appearance of the doorway itself ... However, this problem is solvable.
For several years now, our company has been installing telescopic slopes and extensions, which are manufactured taking into account the individual parameters of a particular doorway.
What are the main advantages of telescopic slopes and extensions?
- First, they are manufactured using a special cast technology;
- Secondly, the material for their creation is MDF coated with a German-made PVC film;
- Thirdly, it is possible to choose the perfect complement to a metal door in the form of slopes and extensions of any of 80 possible shades that imitate natural wood.
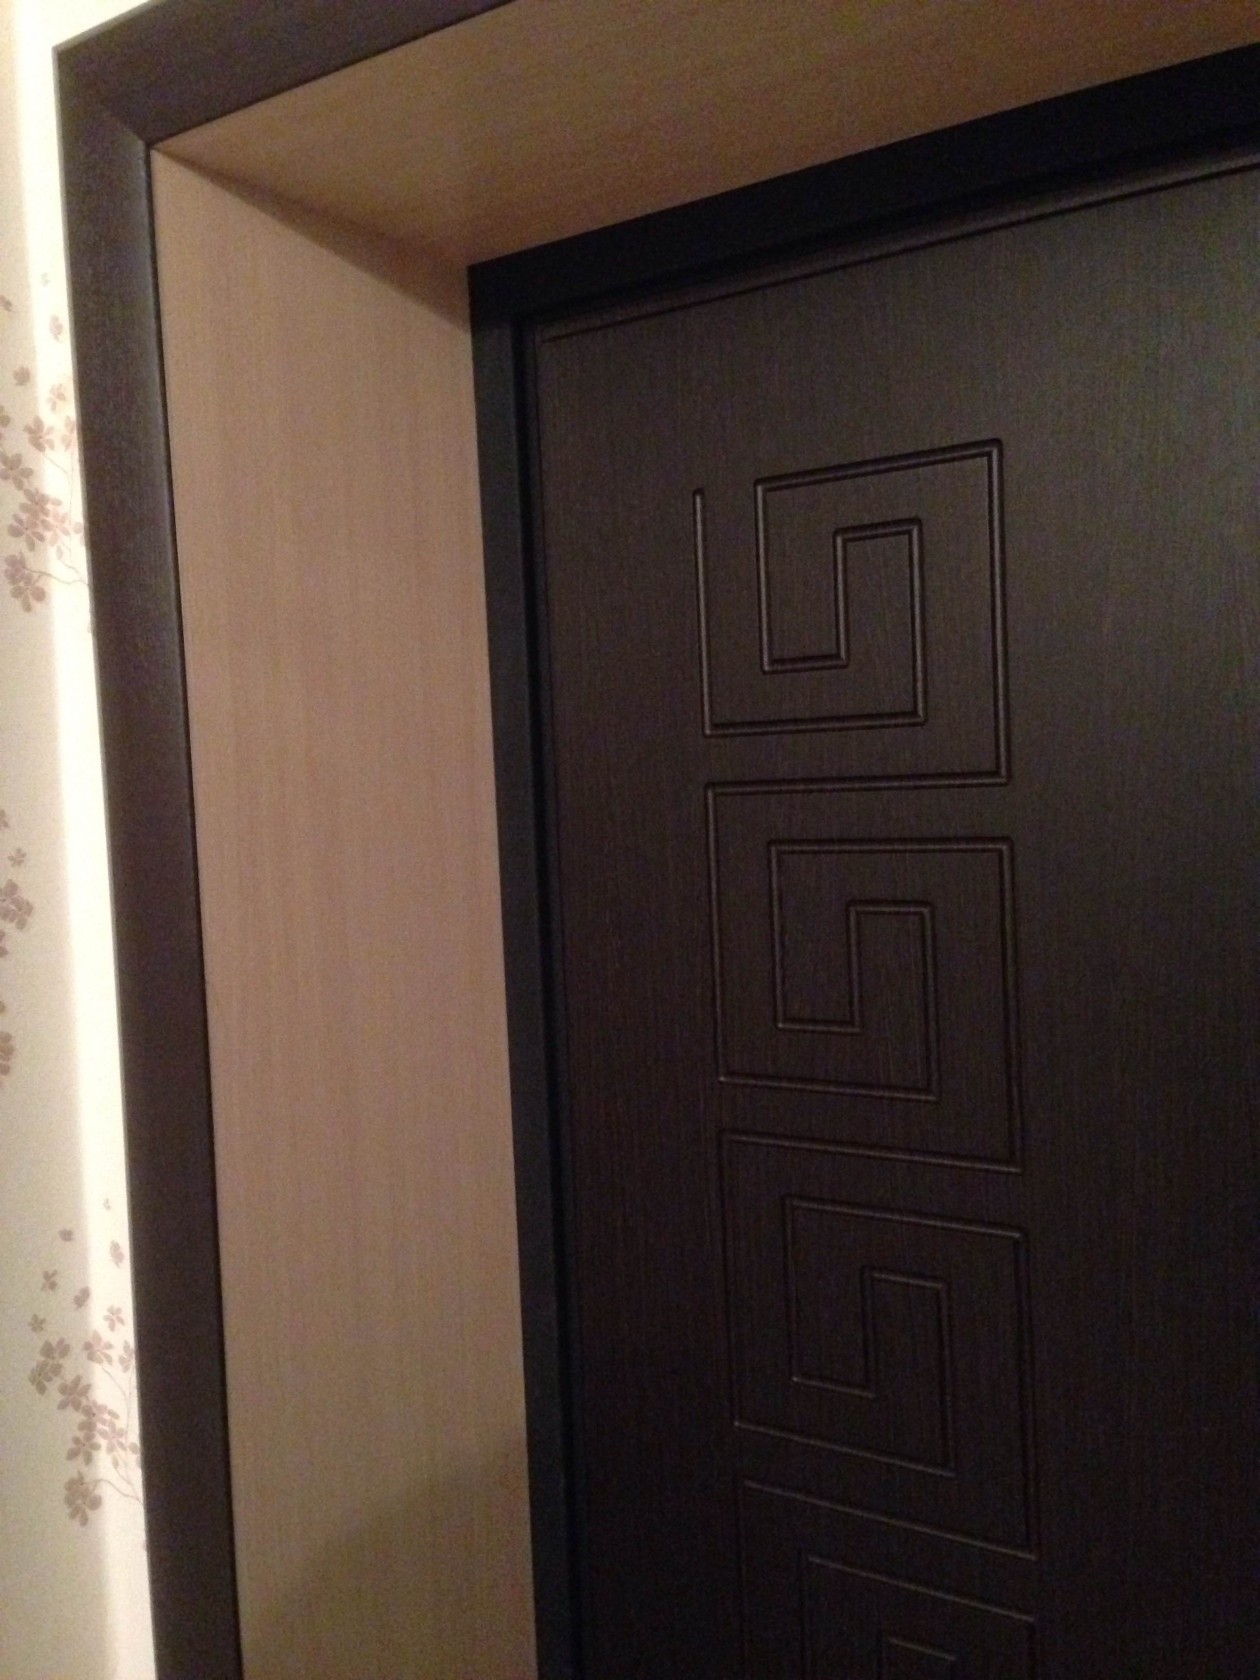
The set of extensions and slopes includes 4 parts: two sidewalls, a threshold and an upper bar. After installation, the slopes are laminated with film, which allows you to hide the seams and joints. The result is a neat, coherent design.
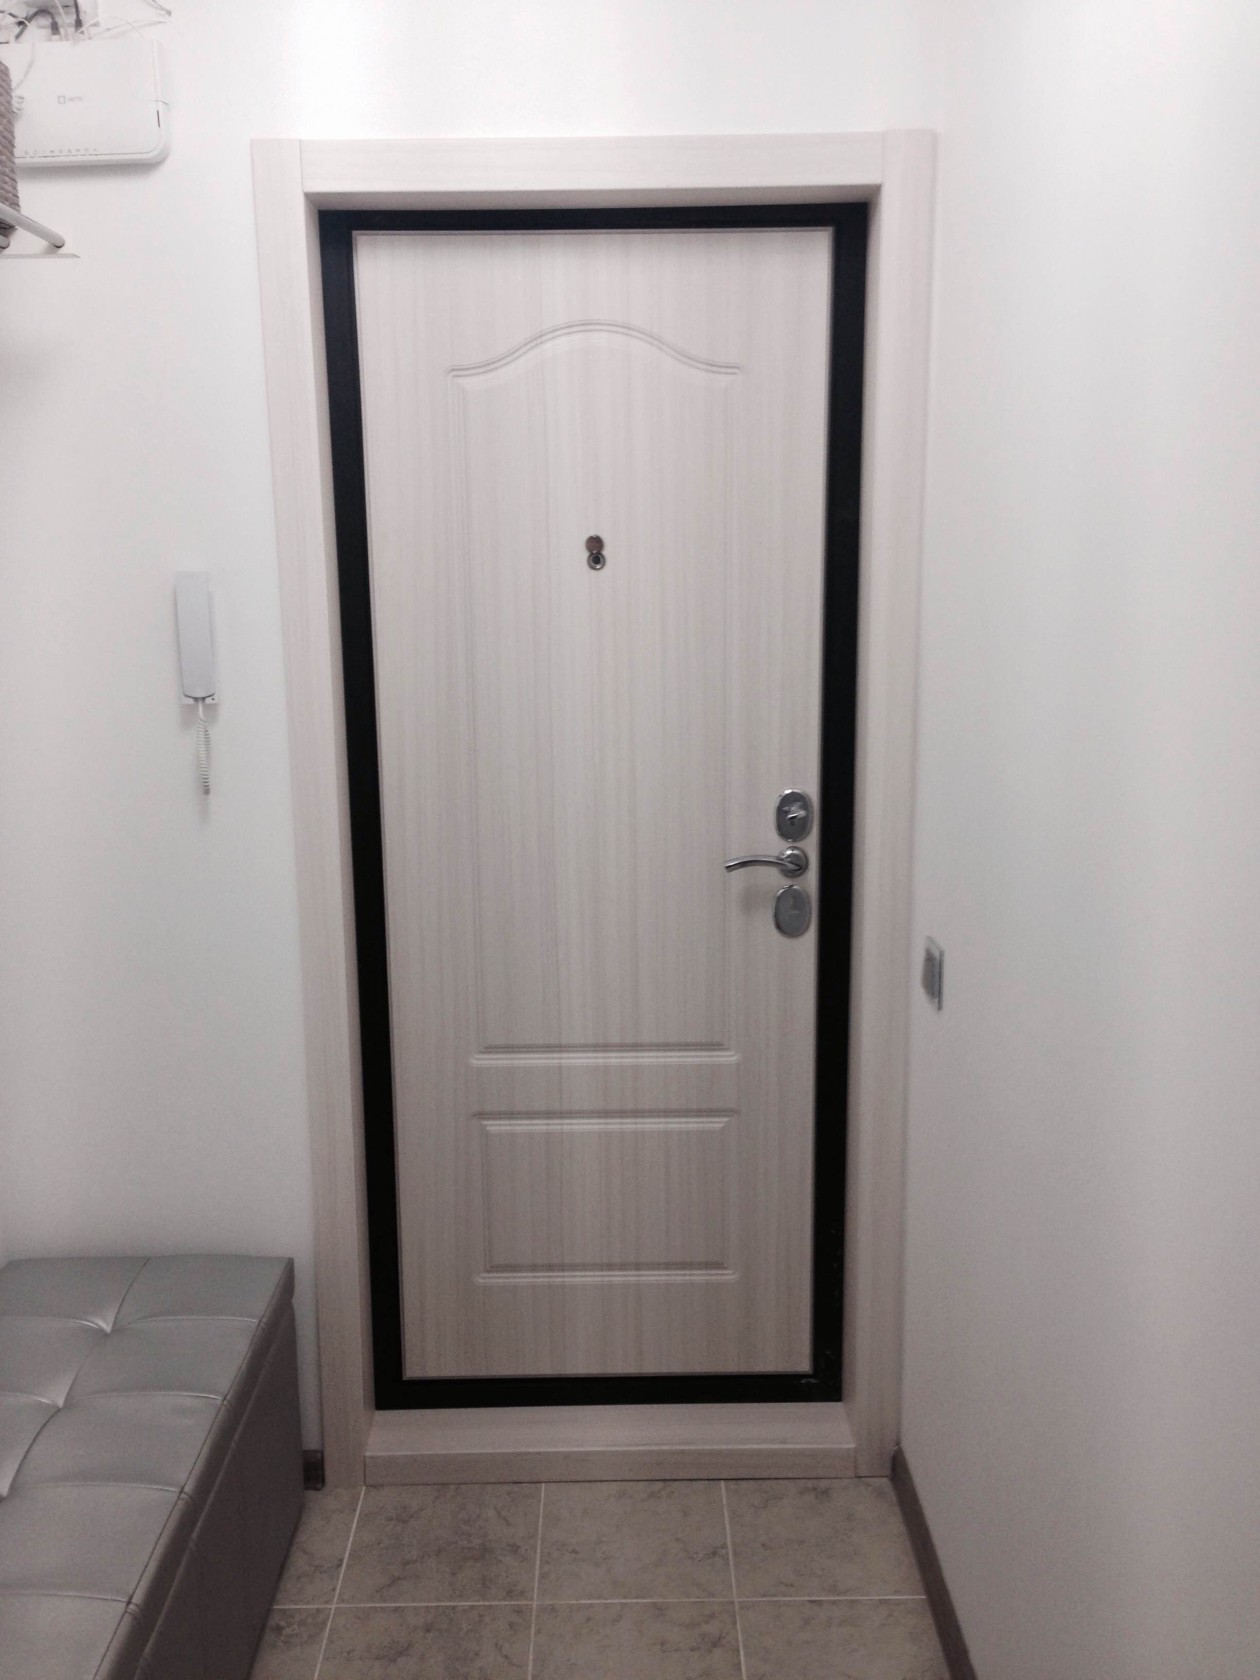
Example 1. Metal door K-80 with telescopic slopes

The first photo shows the front door immediately after its installation. The presentable appearance of the door is lost against the background of burnt wallpaper, wires and mounting plates. Work begun requires completion ...
The second photo shows how the slopes neatly fit into the doorway. Their lacquer finish gives the door a special charm. The color of the products was chosen not for the doors, but for the furniture in the hallway. Since the shade turned out to be darker, it gracefully shaded the color of the front door itself.
Example 2. Entrance door K-70 with sidewall and slopes

The first photos show that here we were talking about a crane with a complex installation, when the doorway did not correspond at all to the parameters of the metal door of internal opening mounted in it. As a result, ugly voids were formed, the cause of which was also the different level of the walls.
But even these difficulties were overcome thanks to the telescopic slopes! They allowed not only to correct all the shortcomings, but also to add solidity to the door and enhance its heat and sound insulation characteristics.
side slopes
The cost of extras is from 6000 rubles.
The price includes: 1. Materials; 2. Delivery; 3. Installation.


![]()


Dobors, slopes of entrance doors
When the new entrance doors in the apartment have already been installed, which ensures the safety, reliability and full protection of the home, the next step is to guide the marathon. From the outside, traditionally, entrance doors are trimmed with platbands, and by the efforts of professional craftsmen they are sealed with special solutions. Much more difficult is the task interior decoration entrance door structure. After all, in plain sight is naked, unattractive concrete or bricks, and all door fasteners are visible, which should be hidden.
The way out of this situation will be the installation of extensions and slopes for entrance doors. Entrance door slopeswill hide unattractive installation elements, making the door look more attractive and neat. Dobory is an equally common and useful choice in the decoration of door structures. The use of addons allows you to refuse to seal the slopes with plaster, as well as to paint or decorate them with wallpaper.
Professional installation of extrusions and slopes from the company "Fortress Doma"
In the specialized company "Fortress of the House", thanks to the availability of qualified personnel, today everyone can order the installation of slopes or extensions. Of course, you can always improve the entrance doors by your own efforts, but the presence of a number of nuances is unlikely to allow you to do the job as efficiently as possible. By entrusting the installation of slopes and fittings to the Fortress Doma company, you get rid of the existing problem and get a full effect within a short time. The craftsmen will fulfill the order on a turnkey basis, fully satisfying the needs of customers and using highly professional equipment.
To order a professional installation of extrusions and slopes, just contact our representatives by phone or leave a request on the website. At a convenient time, the master of the "Fortress Doma" company will visit your home to take the necessary measurements. In addition, together with the customer, the master will determine the most suitable material and color schemethat can perfectly complement the entrance door structure. The only thing that the client will need to do on his own is to decide on the date when the professional installation work will be performed.
A pleasant price on slopes and slopes in our company will certainly delight each of you! Contact us to get the highest quality and aesthetically finished entrance doors!
Dobors, slopes on the front door
To install an entrance door, you must not only choose a beautiful canvas, but also chooseadditions and slopes. Our company "Fortress of the House" is engaged in the installation of entrance doors in Moscow and the Moscow region at the highest level and in accordance with all installation standards.
So that the door fits correctly in the opening in width, it is necessary to pick up complements. The dimensions of the door and the width of the openings may not coincide, in which case it is better to entrust the installation of the accessories to professionals.Dobory on entrance doors Moscow timeour masters selectaccording to the material, color and texture of the installed canvas. Thanks to this, the design looks harmonious and elegant. Fenders are of several types: telescopic, with or without edge, as well as different standard sizes. They are selected based on the model of the entrance door.
Front door slopes ordered together with the installation of the door leaf, so that the composition looks complete and presentable. Slopes of the same materials are selected, from which the outer finishing of the canvas is made.
Dobory slopes for the front door in Moscow and the Moscow region we have reliable and high-quality elements of the front door.
They are additional decorative elements that, in addition to sound insulation, have aesthetic and status value. They act as the final chord in a piece of music. They look very noble and expensive, raising the status of the owner, whether it is a private person or a state corporation.
Finishing door slopes after installing the front door
Price of slopes for entrance doors
- Portals and slopes are made of the same material as decorative trim panels on a metal door. They can be made of solid oak, natural veneer, laminate (PVC film, PVC), painted MDF, and post-formed plastic.
- The cost of platbands and portals depends on the material from which they are made and starts from 450 rubles per 1 running meter of the platband and 550 rubles. per 1 running meter of portals, slopes or (additional) (see prices on the main page in section IV. Cost of the main types of finishing).
- Production time from 10 to 15 working days, depending on the material. For example, platbands and portals from solid oak will be produced in 10-15 working days. Portals and platbands made of postforming plastic and laminate (PVC, PVC) will be produced in 10 working days.
How is the installation of additional components and how much does it cost?
- A metal door is being installed. Then the portals (dobors) are measured exactly, and at the same time the platbands, the master's departure for measurement with samples within the Moscow Ring Road is 1500 rubles, outside the Moscow Ring Road +30 rubles / km. After manufacturing (from 7-14 days), installation takes place.
- The cost of installing portals (extras) from 3000 rubles, and platbands from 2000 rubles, depending on the height and width. Separate installation of platbands is always more expensive, and starts from 3500 rubles.
Colors

Examples of our work on the installation of platbands and accessories for entrance doors.
 |
 |
 |
 |
 |
|
Panel of |
Portal fragment |
Portals and |
Solid oak, |
Solid wood panels |
Modern finishing of openings. Slopes and portals for metal doors.
After installing the front door, you need to put the doorway in order. The corner of the wall that does not have any finishing, with traces of dismantling and expansion, looks dull and spoils the impression of a useful purchase.
Our company offers to correct this unpleasant moment by installing a telescopic slope, made individually for your doorway. The product will not leave a feeling of incompleteness and will create harmony in the renewed interior.
Slopes and extensions are made using molded technology from MDF and laminated with a film made in Germany. The chosen variant of wood imitation from 80 possible ones will give it a wonderful aesthetic appearance.
The finished kit consists of four parts: two sidewalls, a top and a threshold... Platband and complement make up an integral structure without seams and joints , as they are laminated with a film after measurement and manufacturing.
Detailed examples of installing additional elements on the front door
Example # 1
View of the metal entrance door immediately after installation.Wires are loose, burnt wallpaper is visible in the welding places. The mounting plates are visible.


Entrance metal door K-80, after the installation of portals and slopes. The slopes are not matched to the finish of the door, but to the next wall. It turned out very nicely. Slopes with platbands look solid.


Example No. 2
A very complex setup. Entrance door K-70 of internal opening with sidewall. Emptiness in the walls. Different widths at the opening. Difficulties more than enough.


See what happened. Perfectly played different the level of the walls. The opening has a finished look. Looks expensive. It has become cozy and beautiful


Example No. 3
Slopes, extensions and platbands are perfectly combined not only with the entrance doors, but also, as you can see, with the balcony opening


Some other examples:
 |
 |
 |
|
|
Metal entrance door K-60. The color was right and the work was done carefully. Looks just fine |
Entrance metal door K-80. The decorative panel and the slopes, threshold and platbands are very nicely selected. |
Metal entrance door K-70 of internal opening. Holes for the hinges are carefully cut. Slopes and platbands are ideal for decorative panel front door. |
Installed entrance metal door K-60. Installed slopes and platbands. The walls are plastered. It remains to glue the wallpaper. |
The cost of slopes, taking into account measurement and installation (turnkey), is:

- Installation time from the date of measurement to 7 days.
- The call of the master for consultation and measurement with the subsequent refusal of the client from the service is paid in the amount of 1000 rubles !!!
- The price for additional work (plaster, tiles, etc.) is discussed with the master separately on the day of measurement!
- When changing the dimensions of the platband wider than 85 mm (standard) and the length of the addition - more than 2070 mm (standard), the price is determined after the master has taken measurements. The cost of a portal (arch) is calculated as the cost of a slope with a similar width of the addition plus 1,500 rubles per set. Finishing of the slope with veneer is possible.
- Delivery in Moscow 500 rubles. Delivery outside the Moscow Ring Road up to 10 km. is equal to 700 rubles. Over 10 km. is equal to 700 rubles. + 30 rub / 1 km
Very often, when installing entrance doors to a house, they need to be additionally equipped with additional elements and trims. They will be required in order for the opening to be brought to mind in terms of operation, and at the same time create an integral structure along with other elements of the door.
How to install extensions and trims for the front door and what they are, we will consider in this material.
Classification of add-ons
In order to figure out how to correctly put accessories on the front doors, you need to understand their design and the varieties of this device.
They are a part of the door frame, thanks to which the door is connected to the platbands, with their help you can close the wall in the opening. Often wall thickness is greater than the box itself, then you need to use strips, attach them to the box, thereby compensating for the missing material.
Most often, these devices are made from materials such as:
- metal;
- wood.
Also, these elements are divided into the following types:

How to make accessories and platbands for entrance doors yourself
Very often, all the necessary materials for the opening can be purchased complete with the entrance door itself. But you can make them with your own hands, especially if as finishing material natural wood is used... It is very convenient to work with it and it looks great with an entrance door made of any material.
For example, metal canvases are perfectly decorated under a tree, and accessories and platbands from natural wood will look very aesthetically pleasing in this case.
To make platbands and extensions yourself, follow the points of this instruction:

The process of installing addons and platbands: stages of work
The process consists of three stages:
- preparatory work;
- installation of completions;
- installation of platbands.
 Let's start with the preparatory activities. First you need to make sure that each element of the entrance door structure is level. To this end the surface of the walls needs to be cleaned from construction debris and level it with plaster, if necessary.
Slight bulges are not important, since the gaps can then be closed with polyurethane foam. In addition to foam as insulation for the front door, you can use expanded polystyrene or mineral wool... They are placed under the box and extensions to avoid heat loss.
A flat surface must be prepared for the platbands, and they are fixed after finishing the walls. In addition, irregularities on the wall can be hidden by a telescopic extension connected to the box and platbands.
How to place addons
For the installation of add-ons you will need:
- mallet;
- building level;
- hacksaw;
- pencil.
First, you need to remove the excess in height, while measuring the desired distance in advance. The simplest additions are installed using polyurethane foam and nails:
- the element is fixed in the opening;
- then it is nailed so that the nails enter the base in the form of a frame or an additional strip;
- the space between the fence and the wall is foaming;
- spacers are placed in the opening so that the finish does not move under the pressure of the foam.
If you install extensions on metal entrance doors, then the thorn-groove method and or overlapping installation are used, and screws are used instead of nails. A drill is required for the holes.
And in order to install and fix telescopic extensions in the door opening, you need to bring the element to the door frame and insert the spike into the prepared groove... Then the element is pushed out to the desired width, and platbands are placed on the reverse side in the same way.
Polyurethane foam will not be particularly needed here, since the structural elements are already firmly attached to each other, but it can be applied additionally for such purposes:
- providing a stronger connection;
- elimination of gaps between the wall and the cladding;
- providing sound and heat insulation for the front door.
How to put platbands
 We pass to the final stage of work - installation of platbands. Mostly this is necessary so that the extensions on the wall are fixed as securely as possible.
To fix the platbands, you will need glue and nails. And in order not to violate the integrity of the coating, you can use telescopic extensions and polyurethane foam.
Any platbands can be installed from inside the room. For installing a structure made of wood or MDF you will need nails, and the attachment points can be masked with furniture stickers.
It is best to use liquid nails and apply them pointwise so that excess does not come out from under the elements. Telescopic models of platbands must first be attached to the extensions, and then to the wall.
Doors and platbands are needed not only when installing entrance doors, but also for installing interior structures. It is very important to choose these accessories in advance, so that their shade will not be discordant with the door leaf and frame.
And to install these elements yourself, as you can see, is not difficult. The main thing is to follow the instructions as clearly as possible.
Through which frost will penetrate into the house, and heat will go out into the street. And the entrance lobby will look unaesthetic.
You can trim the slopes in different ways:
- Cement and carefully putty;
- Install the sandwich panel slopes. This is an inexpensive finish. But sandwich panels are fragile and short-lived.
- Install MDF slopes. This is a more expensive and at the same time reliable finishing method. MDF slopes are more durable. In addition, they can be matched to the color of the door. Torex produces slopes that fully match the selected door model in color and texture.
You can perform any of these options both independently and with the help of professionals. You can order the installation of MDF slopes from a certified Torex team. In this case, we guarantee the high quality of the work performed. Since the installation of MDF slopes is the most difficult and time consuming, you need to know a number of nuances. If you decide to do it yourself, use our instructions.
What is needed to install the slopes?
To install MDF slopes you need the following tools:
- 1 - miter saw;
- 2 - tape measure;
- 3 - pencil;
- 4 - corner;
- 5 - knife;
- 6 - hammer;
- 7 - masking tape;
- 8 - fastening elements;
- 9 - screwdriver;
- 10 - polyurethane foam;
- 11 - drill.
Stage 1. Control measurement of the opening after door installation
We make an accurate measurement of the actual dimensions after door installation - even if we know the exact factory dimensions.

Measurement must be taken at three points vertically on each side and at two points horizontally (top).

The additional element must necessarily adjoin the door frame, therefore, we measure the length along the width of the door.
Stage 2. Putting aside and marking the required sizes of extensions

After we have measured the required dimensions of the extensions, we put them on the blanks of the additional elements. We make preliminary markup directly on the panel.

Using masking tape, mark the future cutting lines.
On one blank for additional elements, two parts can be set aside - the threshold and the upper part of the expansion.
In the same way, we postpone the dimensions of the second part, make preliminary markings on the workpiece and glue it with masking tape.

We re-mark the length of the addition directly on the masking tape.
If you do not glue the edge of the additional element with masking tape, chips may appear on it during sawing.

Once again, we check the correctness of the markup.

Use a corner to mark the cutting line perpendicular to the edge of the panel.
Stage 3. Trimming the required dimensions

Using a miter saw, we cut the blanks for the additional elements exactly according to the marks.

Saw off the first and then the second horizontal parts of the finish.
We repeat the procedure for the vertical parts.
Stage 4. Assembling the box for additional
Before installation, we assemble the extensions into a solid rigid box.

Using a drill, we drill holes for self-tapping screws - for fastening from the inside. This is a mandatory step so that the self-tapping screw does not split the MDF panel when screwing in.

We make several holes at a distance of 10-15 cm from each other.
Stage 5. Installation of the box

We install the box of extras in the opening. We set it relative to the door so that the gaps between the door and the box of add-ons are the same on all sides.

Spacers are needed in order to fix the box of extras in the opening. We cut them out of a wooden block. The thickness of the spacer is matched to the size of the gap.

A total of 10-12 spacers are required. 3-4 pieces for each vertical extension. Top and bottom - 2 pieces.

Since in the future we will need to install the platbands and close the gap, it is important that the spacer does not protrude beyond the edge and the wall.

We hammer in all the spacers in the same way.
Stage 6. Installation of platbands

We attach the platband and mark the required length. The size is set by the angle of the internal intersection of the horizontal and vertical extensions.

Likewise, postpone the length of the second cashier.

We mark the length along the inner corner of the extensions.

We cut the platband with a miter saw at an angle of 45 degrees.

Polyurethane foam is used to fix the box of additional elements. Gives the structure rigidity, additional sound and heat insulation.

It is important not to overdo it with the foam volume, so as not to deform the pad.
At the same time, if there is too little foam, the opening will be leaky and not rigid enough.
To remove excess foam, you need to wait for it to cool and cut off with a knife.
Try to avoid getting polyurethane foam on extensions, walls and flooring.

First, we install vertical extensions, then horizontal ones.
We fasten the platband to the finish with decorative nails.

To install the platbands, you will need about 20 decorative nails. They are clogged at a distance of 20-30 cm from each other.
On average, each vertical platband will require 7 decorative nails, for horizontal ones - 3-4.

We measure the size of the horizontal casing.
Starting from the larger size, we cut at 45 degrees to decrease.
The horizontal platband is fixed to the box of complements and the vertical platband.

We press the structure to the door frame and fix it with masking tape until the foam hardens - for 1–2 hours. The exact time depends on the drying time of the foam, which can be seen on the package.
Then you can remove the masking tape. Your front door is ready!
Installation of slopes: video
If you have never installed doors and slopes before, we recommend that you contact the Torex installation team, which will perform the installation as quickly and efficiently as possible. The result of the work of our professionals is guaranteed.